
After hours of shop time and successfully installing thousands of dollars worth of upgrades through the first two parts of our project truck series build, it was a little frustrating that our 6.4L was still looking as stock as they day I got it. Don’t get me wrong I like sleeper trucks, but at dyno events and sled pulls. For a truck that I want to represent me as the editor of Diesel Tech magazine when completed, it simply can’t look stock. Yet after buying the 2010 Ford F350 from Autos 4 Less in Idaho Falls, Idaho, just a few short months earlier, you couldn’t really tell from looking at it that anything had we had done anything to it.
Where We’ve Been
To help get you caught up on where we’re currently at with our build, we’ll do a quick recap to refresh your memory. In Part One we teamed up with Bullet Proof Diesel in Mesa, Ariz., and upgraded the EGR Coolers as well as added its BDP Oil Cooler System Half Kit with the Bypass Oil Filtration system. Also at this time we upgraded to the BD Power Xtruded Charge Air Cooler (CAC), added front and rear differential covers from advanced FLOW engineering (aFe), as well as a deeper transmission pan, and changed all the fluids using Royal Purple products.
In the second round of installs we worked with Adrenaline Performance in Shelley, Idaho, where the crew installed an Edge Evolution CTS tuner with backup camera, aFe Momentum HD intake and MBRP black exhaust. Additional upgrades at this time included the FASS fuel system, OPTIMA YellowTop batteries and WeatherTech FloorLiners. The last product we installed in Part Two was the Conductor’s Special Nightmare Edition 244K model train horns from HornBlasters. I have to be honest, I am having a lot of fun with these horns and I’m not sure how I ever owned a truck without a set. I really need to create a YouTube video showing people’s reactions to the loud blast, it’s too funny not to share.
Exterior Needs
We’re only getting started on what we’re going to do under the hood, but before we go any further with our build we felt some cosmetic upgrades were badly needed and nothing changes the look of a truck like a set of new tires so we decided to start there.
Cooper Tires
.JPG_600.jpg)
I made the mistake once of getting knobby mud tires on a previous truck. While I loved the look as well as the ride when I would go off-road to camp, I regretted the decision based on the noise and road vibration from the highway. So I was determined to do my homework this time around and truly find a quiet, smooth-riding tire. I found exactly what I was looking for after visiting the Cooper Tire booth at the SEMA show last year. I had a feeling I couldn’t go wrong with any of its all terrain tires, but after some research I went with the LT325/60R20 A/T3s tires from Cooper. Going with bigger tires instantly improves the look.
I couldn’t be happier with my choice. I love the quiet ride, great all-around traction and since I’ve been putting a lot of miles on this truck the fuel-saving design has been welcomed as well. The Discoverer A/T3 utilizes a balanced combination of technology, compounding and design to produce a tire that I’ve found performs well in nearly all types of terrains. The tread compound enhances wet traction and reduces rolling resistance, while the aggressive tread design significantly improves off-road traction without sacrificing highway performance.
Hostile
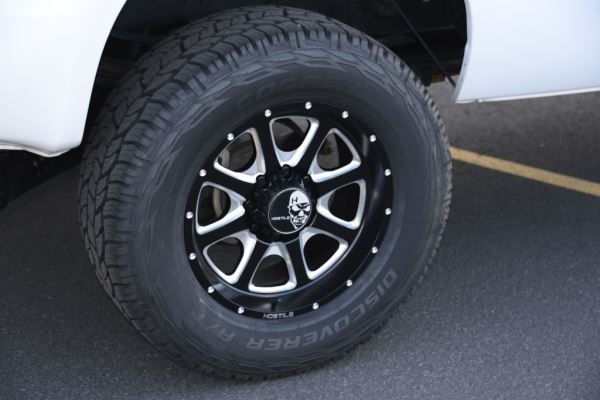
The Cooper tires are for function, but the design of the actual wheel is what really sets the tone for the truck. For whatever reason, I had the hardest time deciding which wheel design I wanted. Also at SEMA I had talked with Mike Cunha from Hostile Wheels and he actually made my decision even harder by giving me a sneak peek at the new wheels and what Hostile has to offer truck enthusiasts. After talking to him I knew I wanted a black wheel, but not an all-black wheel and I was adamant that I went with Hostile and one of its popular wheels. Seriously, how can you go wrong with Hostile? I love the wide variety of wheels this manufacturer offers. After weeks of contemplation, I finally pulled the trigger on a set of Hostile 20x90 EXILE Blade Cut wheels and once I opened the box and saw them in person for the first time I knew I had made the right choice.
Jack’s Tire
.JPG_600.jpg)
There are some things you can’t really do yourself and for me that includes mounting and balancing tires.
I didn’t give this a lot of thought; I just took my tires and wheels to Jack’s Tire & Oil in Idaho Falls, Idaho, because the shop manager here always takes good care of me.
This wasn’t the first time I’ve taken my truck to Pete and his crew and it won’t be the last. The funny thing about the manager, Pete is actually just his nickname. His real name is Matt Peterson, but everyone calls him Pete so we do too.
Ken Chick, who has worked in this shop for over 20 years, mounted the Cooper Tires on the Hostile Wheels.
The guys in the shop did a great job and even went the extra mile to include black lug nuts for my new wheels. The shiny chrome-plated ones would have killed the look I’m going for with this mostly black and white truck that I have planned.
Not that we should really worry too much about what other people think—especially strangers on the road—but as I rolled onto the street as I left Jack’s it felt great not to be driving a stock-looking truck anymore.
PowerTech Diesel
From day one this build has been about going with products and shops that I’m most comfortable with so when I needed a little help transforming the exterior of my truck I called PowerTech Shop Manager Nick Snarr. Nick not only worked me into the performance shop’s busy schedule, but at times he couldn’t help but get involved with some of the installs since he appeared to be just as excited as we were to see this truck come together.
PowerTech Diesel is based in Idaho Falls, Idaho, and is owned by Brent Willsey who has established himself in the industry as the place to take your diesel truck. From increasing horsepower to problem-solving, Brent and his crew really know their stuff.
AnzoUSA
.JPG_600.jpg)
We installed Anzo lights on another project truck last year and I remember adding them to my future wish list because I knew I wanted this same look for my next truck.
The difference when compared to stock makes you wonder why everyone doesn’t swap out to Anzo lights they day they get their truck.
To swap out the headlights, taillights and cab brake light, but then leave the obnoxious stock orange mirror lights would be a shame. We went all in with Anzo lights on this build.
To really take this one step further, the 60-inch L.E.D. Anzo Tailgate Lightbar was added that includes six different functions: sequential amber signals, reverse lights, brake light, parking light, left indicator and right indicator. It really helps customize the look, plus gives drivers something to stare at when I’m stopped at a red light.
Status Grilles
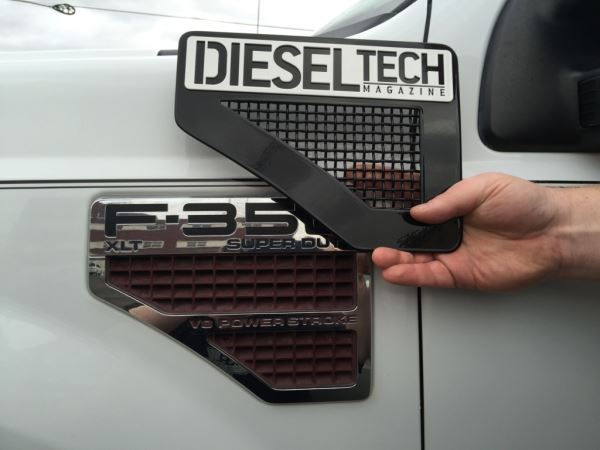
It’s the little details that make all the difference when building a truck. As editor of Diesel Tech magazine I went through Status Grilles to have custom side vents created to help give my build a personal touch.
“I like this kind of stuff that makes the truck your own,” said Tech Tanner Landon while he compared the new plate to the old stock one. “There’s not a better way to let everyone know that this is your truck.”
The custom metal vents fit perfectly flush and it’s great how much positive attention I receive from having these on the truck now.
Pace Edwards
.JPG_600.jpg)
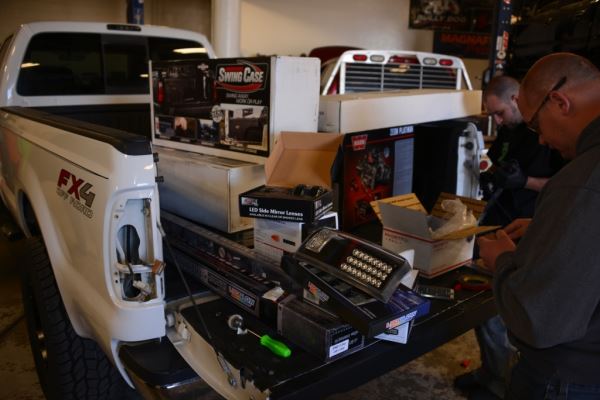
When it comes to bed covers, everyone seems to have an opinion on what works best. Some truck owners prefer the soft covers that roll up, others like the solid tri-fold design and others swear by the one-piece hard top. This was another one of those decisions that I agonized over as I weighed in on the different options.
I went in search of a “best-of-all-worlds” type cover and that’s where Pace Edwards really shines. It rolls up like a soft cover, yet it’s aluminum so it’s similar to a roll-up type garage door. Plus it’s compact and nicely stores in the front of the bed using only 10-inches of space, which is nothing when you have an 8-foot long bed.
Pace Edwards has a great selection of products, but in the end I felt the Full-Metal Jackrabbit retractable bed cover was the best fit for my build. The cover comes pre-assembled, which made the install that much easier. We rested it on a couple of boxes while we positioned it where it needed to be. You can tell just from looking at it that it’s a heavy-duty and top-quality cover.
Before the front canister cover is on you can see how tightly the cover rolls up when it’s not being used. There are even designated areas for the Speed Clamps, which takes away the guesswork on where each of the four clamps need to be placed. The install is a quick, drill-free installation. The cover has a perfect custom-like fit and because it locks, you know whatever you put in your bed will be secure. The other feature we like is that it’s flush with the rails for a low-profile look.
The tough powder coated aluminum deck not only looks good, it’s also durable and built to last. Plus the exclusive, heavy-duty Continuous Tension Spring (CTS) allows the cover to open automatically when the latch is turned and retract into the canister at the front of the truck bed. The cover locks in 12-inch intervals, which truly makes it versatile.
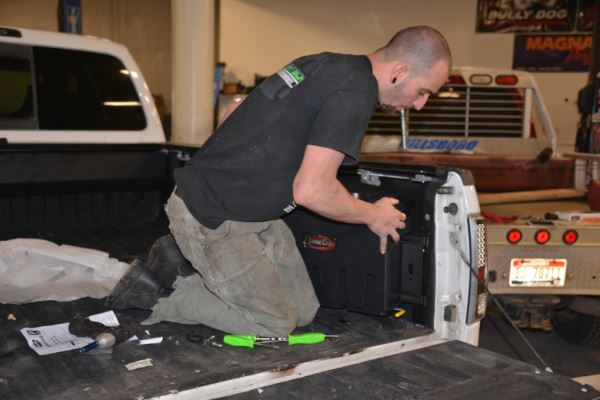
Following the bed cover install, EJ Wyatt installed the SwingCase. This is another one of those great products that I had on my previous truck that I had to have again. The SwingCase from UnderCover Bed Covers gives you the benefit of having a tool box, without interfering with your bed cover. Plus it has an improved design that gives you even more room in this otherwise dead space in your bed. Each case locks and easily swings out so it’s easier to access when you need it.
Road Armor
Nothing can make or break the look of your truck like a bumper. Clearly keeping the stock bumper was not an option, but with so many to choose from it’s not an easy choice. After doing some homework and based on previous experiences with this company, I decided Road Armor had the look and durability I wanted. This industry giant is dedicated to manufacturing performance products and excels in form, fit and finish. Using the latest in parametric 3D CAD software and state-of-the-art equipment, Road Armor’s Super Duty Stealth Winch Bumper with Pre-Runner Guard was exactly what I was looking for.
.JPG_600.jpg)
Since the day I bought the truck, complete with a nice little dent in the bumper, I’ve been looking forward to the day I upgraded my bumper. The Bulletproof Diesel Bypass Oil Filtration system install from Part One relocated the oil filters to the inside of the front bumper. This meant the BPD bracket would need to be slightly modified since this system was designed for the stock bumper. Everything matched up with no other tweaks needed.
Before installing the Road Armor front bumper, we first added the lights. Rigid Industries has created a solid reputation by manufacturing well-built products so I ordered two sets of lights from this company to fit the bumper. Rigid recently released its High & Low dual function LED light and I was excited to see how they work.
.JPG_600.jpg)
Even off the truck, the Rigid lights look great in the bumper. The lights provide the option of high or low intensity LED lighting to suit any environment. The lights include a three-position rocker switch, but I choose to wire them directly into my regular lights so no added switches were necessary on my dash. Not only is this cleaner, but when I flash my brights the high beams on my bumper lights turn to the high mode too.
Another addition to the bumper was the new WARN ZEON 12 Platinum Winch. I’ve always wanted to have a winch on my truck so I figured why not go with one of the top manufacturers.
The WARN winch tucks away nicely in the Road Armor front bumper. Using the ZEON Platinum Control Pack relocation kit, the full winch with controls is completely housed in the bumper.
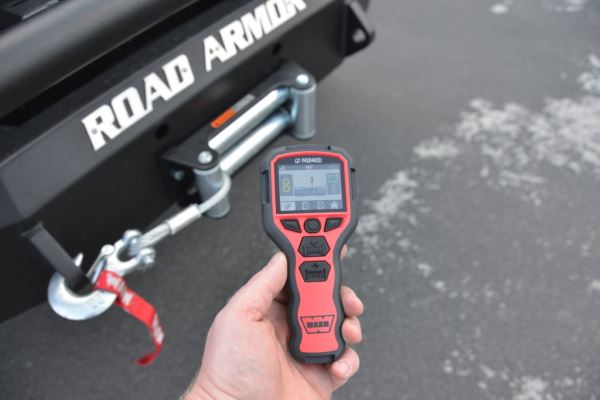
The remote controlled clutch is engaged and disengaged with the Advanced Wireless Remote. The remote controls winch-in, winch-out and freespool operations. The manual clutch has been eliminated so no more re-engaging a manual clutch, with frozen fingers while standing in the mud.
With the front bumper now in place, it was time to move towards the back for the rear bumper install. The rear Stealth bumper from Road Armor is a perfect match to the front one. From Rigid’s SR-M Series, two rear lights were added to the bumper that automatically turn on when you put the truck in reverse.
Bestop
.JPG_600.jpg)
Face it. Drop down steps that automatically deploy when you open the door is kind of cool. I know they’ve been around awhile, but I’ve never had a set and I’m really enjoying them. Plus I like that they’re plenty wide and drop down lower than stationary steps so it’s easier to get in the truck.
The main feature that makes the Powerboard NX from Bestop unique is the wireless sensor system. This allows for a much easier install and can be done by anyone without any issues.
Typically you would have to pull off doors and panels to wire into the factory door switches. We’ve found with other systems that often the hard wiring is not straightforward and many wires had be tested to find the correct one. This wireless system from Bestop cuts install time in half and in some cases saves hours of testing door wires.
When closed the Powerboard NX tucks away nicely and completely out of the way.
T-Rex
.JPG_600.jpg)
After removing the stock steps, F350 plate, wheels, bumpers and anything else we could find that wasn’t black on this 6.4L Power Stroke, there was no way we were going to overlook the grille. The X-Metal Series Grilles from T-Rex provide a rugged aggressive look on a laser cut frame with an X-Metal logo mounted on the formed mesh.
We went with the black powder coat version to help tie in the black and white theme of our build. The inserts fit in perfectly with the existing grille, but because my stock grille wasn’t black I ended up swapping it for a black Ford work edition grille at a local scrap yard. When I was planning this build I had a good idea of what it was going to look like, but seeing the T-Rex grille with the Anzo lights and Road Armor bumper complete, I was blown away with how well it all tied in together.
Give It A Lift
.JPG_600.jpg)
The last round of installs for Part Three had us leveling the front out. I didn’t want to add a lift to this truck, but I did want to level the front out a little. Working with SuspensionMAXX and KYB, I knew I could give my truck the stance I wanted.
The Cooper Tires and Hostile Wheels were removed and the truck was put up on stands to get ready for the lift. The SuspensionMAXX 2.5-inch leveling kit maintains the OEM ride, while increasing the ride height for a more aggressive appearance and improved function. While adding the leveling kit we figured this was the best time to also replace the worn out stock shock with the KYB MonoMax Shocks. The heavy-duty monotube shock is ideal for heavier diesel engines and is great for hauling and towing. Together the leveling kit and upgraded shocks complete the upgrade to the front end of the truck.
Mission Accomplished
My goal heading into Part Three was to let everyone know this truck is no longer stock and I admit I might have got a little carried away with the exterior upgrades. Of course, I’m a believer that you can never go too far when it comes to modifications. I’m truly loving the progress on my build and I can’t thank PowerTech Diesel enough for helping me with this round of installs. Part 4 will have us going under the hood as we attempt to double the horsepower to match the look of our now extremely aggressive 6.4L Project Truck.